
Object

Photo Object Remover

Keep the shot. Clear the distraction. This photo object remover lets you brush over cables, clutter and stray items, then compare the repaired scene before downloading.

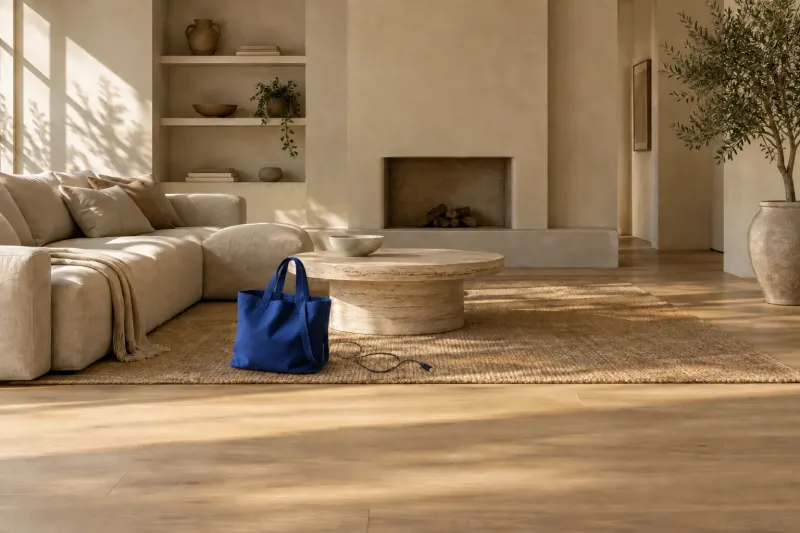
Sunlit living room, shown with and without a blue bag and loose cable.OriginalEdited
AI example · drag to compare

Start with a photo.

or drop an image here

JPG, PNG or WebP · up to 10 MB
Try an example
You choose what disappearsYour photos stay out of public galleriesSee the difference
WHAT WOULD YOU REMOVE?

See what a photo object remover changes

A distracting object need not cost you the whole composition. Select the unwanted detail and AI fills that area using the surrounding scene as a guide. The example below illustrates the workflow; your result depends on the image, the selection and the background.

Sunlit living room, shown with and without a blue bag and loose cable.BeforeAfter
AI-generated scene illustration. Your results will vary.
01 / Object

Remove the prop, keep the composition

Use the comparison slider to inspect the object and the surface around it. A photo object remover generates a plausible replacement for the selected area. It cannot reveal the exact pixels hidden behind an object. Look for continuous edges, consistent lighting and convincing texture before deciding the edit is ready to use.

  • Product listings
  • Room photos
  • Cables and clutter
Clean up my photo
WHEN TO USE IT

Where a small cleanup makes a difference

01

Product photos with fewer distractions

Use the photo object remover for loose packaging, a stray cable or a prop beside your product. Keep the product outline and its grounding shadow outside the brush selection. If you need to remove an item from a photo, check that the repaired tabletop still meets the product edge naturally.

02

Rooms without loose clutter

Clear a bag, bin or loose cord from an interior photo while keeping the room layout. Small objects against a plain wall are easier than furniture covering patterned flooring. Then inspect skirting boards and tile lines near the repair.

03

Outdoor details that compete with the view

A wrapper, cone or small sign can pull attention from a garden or street scene. Try the photo object remover on one isolated distraction first. Fine branches, fences and paving patterns need closer review because a believable repair may still contain a bent line or repeated patch.

UPLOAD. BRUSH. REMOVE.

How to use the photo object remover

01

Choose your photo

Open a single JPG, PNG or WebP image up to 10 MB in the photo object remover. You can prepare the selection before signing in. Large photos are resized to a working image with a longest edge of 1024 pixels, so keep your original file separately.

02

Brush over the unwanted object

Adjust the brush size and cover the full object, including its edges. Use the selection eraser or Undo if you touch something you want to keep. To remove an object from an image cleanly, include its unwanted shadow while leaving nearby useful detail outside the selection.

03

Run, compare and download

Sign in and choose Standard for 1 credit or Precision for 2 credits. Run the edit, compare it with the working original and download the PNG when satisfied. To remove objects from photos in a collection, repeat this process for each image; this editor handles one photo at a time.

Sunlit living room, shown with and without a blue bag and loose cable.
Your photo. Your focus.AI-generated scene illustration. Your results will vary.
THE DETAILS THAT MATTER

Get a cleaner result from your photo object remover

01

Cover edges and unwanted shadows

Leaving a thin rim unselected can leave a visible outline after removal. Cover the entire item with a small margin, then add the shadow that belongs to it. Avoid painting a broad rectangle across nearby detail. If two objects overlap, decide which edges must remain visible before running the edit.

02

Trace cables with a smaller brush

Follow the cable from end to end, including detached segments and any obvious reflection. Zoom in for tight corners and use the selection eraser to protect adjacent edges. A narrow, continuous selection gives the photo object remover more surrounding texture to work with than a large patch covering the whole area.

03

Inspect patterns before keeping the result

Check brick joints, floor tiles, fabric and straight borders in the comparison view. An edit can look convincing at a glance but bend a repeating pattern. If the repair smears or leaves fragments, adjust the selection and try again. Each new generation uses credits; technical failures return the credits charged.

Photo object remover output, cost and privacy

PNG download, up to 1024 px

Downloads use the working image dimensions, up to 1024 pixels on the longest edge. They are not original resolution exports. Check the dimensions shown with your result before using it in a listing or design. We add no watermark to the finished PNG.

Choose the cost before editing

Standard uses 1 credit per generation; Precision uses 2. Downloading a completed result adds no charge. A technical failure refunds the generation cost. Trying a different selection is another edit, so compare the result carefully before spending credits on a new attempt.

Pricing

Private storage for 30 days

The photo object remover stores working photos and results privately for 30 days, with the option to delete them sooner. Processing sends images to an external AI service. Save any result you want to keep before it expires, and upload photos you have permission to edit.

Privacy policy
GOOD QUESTIONS

Photo object remover questions

How does the tool erase objects in a photo?

The photo object remover uses your brush selection to identify what to remove. AI generates a replacement from the surrounding context. Standard blends it into the selected area; Precision returns a complete edited photo. The new texture is estimated from visible clues, so inspect nearby objects and the rest of the image.

Will the object’s shadow disappear too?

Only if you include the unwanted shadow in your selection. Look beyond the object for a dark patch or reflection. Leave shadows from things you want to keep outside the brush strokes, especially where they meet the selected area.

Can I remove a large object without cropping?

You can keep the framing, but large objects leave less surrounding context for a repair. Selections covering more than 65% of the image are blocked. Smaller objects on simple backgrounds are a better starting point than a sofa covering most of a room.

Can I remove objects from photos in a batch?

This editor processes one image at a time. You can select several small objects within that image, provided the total selection stays within the limit. To remove objects in photos from different scenes, open and check each photo separately.

Will my download keep the original resolution?

Large uploads are reduced to a working image with a longest edge of 1024 pixels. The PNG uses those working dimensions. Keep the full resolution original for larger prints.

Do I need an account and credits?

You can choose a photo and prepare your selection first. Running the photo object remover requires signing in and enough credits for the selected mode. Check your balance and the displayed cost before starting; downloading an existing result costs nothing extra.

Is object removal the same as background removal?

An object remover replaces selected distractions while retaining the scene. A background remover isolates a subject, often against transparency. Use this page when you want to remove an object from a photo and keep the surrounding composition.

What if the repair looks blurred or unnatural?

Check for an incomplete outline, an unselected shadow or an overly broad selection. Refine the brush strokes and compare another attempt. Complex patterns and large missing areas can remain imperfect, so keep the original if the repair does not look convincing.

AI Object Remover

Try the photo object remover on your next shot

Choose one distracting detail, make a careful selection and inspect the repair.

Clean up my photo